The Story
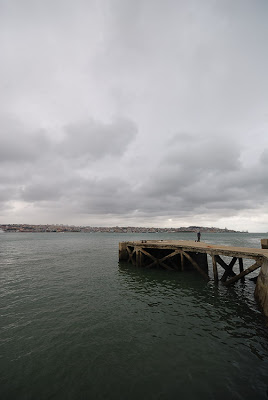
June, 2009. It was summer time but it didn't felt like it. The day was very cloudy, almost rainy. A few days before I've been scouting a spot near my home that I thought would give a good photo: the former Lisnave shipyards, in Cacilhas, Almada on the south bank of Tagus river. In the day I went there for the first time, I found a good place to shoot the Lisnave site, from a higher ground, but the day was sunny, so I left it for another proper day. That proper day had arrived: the sky was covered with clouds.
I picked the gear and went to Cacilhas take the shot. After a couple shots there I remembered that I hadn't properly explored the Ginjal pier in Cacilhas. So I parked in the pier and started exploring the site. This pier is next to the ferry that connects to Lisboa and it is about 2500 feet (750m) long. It is filled with abandoned houses and warehouses and some not abandoned ones. I took plenty of shots, trying to get new perspectives, and this one was one of my last photos there. Less than five minutes after this shot, it started to rain a lot so this photo trip was over.
A few perspectives were missing, so I'll return there someday.
Equipment / Technical Info
Nikon D80
Sigma 10-20mm F4-5.6 EX DC
1/100 second
F/8.0
10 mm
100
Original Photo

Post Processing
Back home, this photo wasn't, surprise, surprise, one of my first choices :) Only almost one week after, I decided to give this photo a chance. My first thought was to find a way to darken the clouds and give it a more dramatic look.
I imported it into Lightroom and adjusted the perspective with a proper Crop. I've added a Graduated Filter to darken the sky and lighten the river. Then, I've increased the Exposure, the Contrast, the Fill Light, the Clarity and the Sharpening. I wasn't fully satisfied so I started playing around with the presets. I ended up choosing the "Civil War 2" preset by Vidular (you can find it here: http://www.flickr.com/photos/vidular/2456010834/). After the preset, I've lightened the pier base with a brush so that it would show more detail.
In CS4, I've done: Auto Tone, Auto Contrast, Auto Color and Auto Levels. Then I converted to Black and White (Green Filter preset) and increased the Vignetting to the maximum. Finally, I've warmed the photo a little with the "Warm (26)" action from TLR (you can find this and other actions to simulate the effect of Gradient filters here: http://www.thelightsrightstudio.com).
This gave me the full size (10Mp) final image.
I usually publish my photos with 1024px in the largest size and use a great Photoshop action by Manyk to do the re-size.
You can find it here: http://manyk.deviantart.com/art/Web-Sharpening-with-Photoshop-29038461
Final Photo

Link to image
http://jpgmn.deviantart.com/art/The-Pier-128186829


0 comentários:
Post a Comment